Server Installation
Recommendations
It is highly recommended to run softwareAssistant in a virtual machine by itself (no other services running). SA will have management capabilities (admin access) to all connected clients, so keeping the server as secure as possible is critical.
Secure server setup is beyond the scope of this document. The admin should take all additional configuration steps needed to properly secure the server!
Currently there is no testing done with alternate versions of the below software. Please stick to the documented software until you are familiar with the SA setup process.
VM Configuration
Server configuration will vary depending on client concurrency and configured actions. You should adjust the storage based on how large you predict your package repo will be. Choose a size large enough to work for several years in the future, it is not as easy to add storage as it is to add RAM and CPU Cores.
You should be able to use any hypervisor, but I have only tested HyperV at this point. The settings below are specific to HyperV, but there is nothing specific to HyperV that is required to run SA.
I am currently managing ~250 client computers using a VM with the following specs:
- RAM: 8192 MB
- Processor: 4 Cores (Hyper-V host has a Xeon X5670 @ 2.93GHz)
- Storage: 256 GB
HyperV Wizard settings:
- VM Generation: Generation 2
- Startup memory: 8192 MB
- Networking: Select your public network connection
- Create a virtual hard disk: 256GB
- Install an operating from a bootable image: select the ubuntu ISO
Before beginning the install, open the VM and adjust:
- Processor: increase to 4 (or 8) virtual processors
- Security: Secure boot set to Microsoft UEFI Certificate Authority
- Automatic start action: Always start
- Automatic stop action: Shut down
Linux
This document was written using Ubuntu Server 26.04 LTS. The tutorial for getting started installing ubuntu server is worth a read.
Start the VM, and the Ubuntu Server installation will begin.
- Try or Install Ubuntu Server
- Choose your language and keyboard layout
- Ubuntu Server
- Enable 'Search for third-party drivers'
- Configure the network
- Configure an IP address if DHCP is not available
- Add proxy if necessary
- Mirror test should be successful at this point
- Default storage layout is fine
- may need to adjust the LVM partition to use all free space (defaults to only 100G)
- Edit ubuntu-vg partition, leave space empty and it will deafult to maximum available.
- keep LVM enabled in case a future resize is necessary
- may need to adjust the LVM partition to use all free space (defaults to only 100G)
- Begin installation
- Enter name, username, hostname, and password
- Be sure to use a very strong, unique password here, save it to your trusted password manager.
- Install OpenSSH server
- Remember to secure later
- Dont bother with additional snaps
- Installation will continue a few minutes
- Reboot after installation is complete
- You may need to manually eject the ISO and restart
Dont forget to configure unattended-upgrades and network firewall, backups, plus any additional configuration required to secure the server not covered here.
Consider taking a snapshot of the VM now to simplify rollback if necessary.
Apache/MySQL/PHP
Background:
lamp-server^ is a meta-package which installs all lamp-server packages and dependencies packages at once. It should also maintain the lamp-server packages and dependencies going forward. SA also requires some additional PHP modules to function.
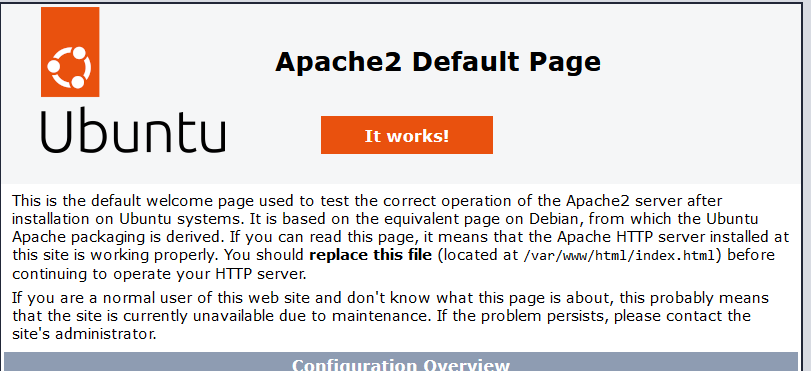
You should now get the Apache default page when visiting the IP address of the server with a web browser:
Configure MySQL account for Software Assistant
We need to create a username and password for use by SA to access the databases.
# start mysql as root, no password required when running as root
sudo mysql -u root

# substitute the [username] and [password] in the next lines
CREATE USER '[username]'@'localhost' IDENTIFIED BY '[password]';
Note the username and password, we will add this to the SA configuation later.
Optimize MySQL for faster access
Since this server will basically be a type of database server, configure MySQL to use half your system memory for caching.
# Buffer pool size must always be equal to or a multiple of innodb_buffer_pool_chunk_size * innodb_buffer_pool_instances
key_buffer_size = 2048M
innodb_buffer_pool_chunk_size = 128M
innodb-buffer-pool-instances = 16
innodb_buffer_pool_size = 2048M
Check the new config was accepted after restarting mysql:
# start mysql as root, no password required when running as root
sudo mysql -u root

SELECT @@innodb_buffer_pool_chunk_size/1024/1024;
SELECT @@innodb_buffer_pool_instances;
SELECT @@innodb_buffer_pool_size/1024/1024;
SELECT @@key_buffer_size/1024/1024;
Samba
Samba allows the admin to maintain the SA repository remotely over SMB. Only the admin needs access via SMB. A firewall should be used to restrict access to only the admin's workstation(s).
Install Samba
Configure Samba
Add the following to /etc/smb.conf
[global]
  server min protocol = SMB3
  client min protocol = SMB3
  smb encrypt = required

[software]
  comment = Software Assistant SMB Access
  path = /var/www/software
  force user = root
  force group = root
  read only = no
  browseable = yes
  writeable = yes
  valid users = [admin_username]
  hosts allow = [admin_ip_addresses]
  hosts deny = ALL
Create the admin password for Samba access
Create the admin's SMB password (be sure to use another very long and complex passphrase, store it in your trusted password manager)
Restart the server to utilize new configuration: